Hi all
I didn’t write for last month and half. Why? I had some very positive tremors in my life, and good news is on the way. Just watch my LinkedIn profile ![]()
At 3rd April I will have presentation about Private Cloud based on System Center 2012 tools at MS NetWork 3.0 conference. More info about conference can be founded here www.msnetwork.ba
At the end of April I will have another one presentation. This one will be at WinDays 13, and I will speak about System Center Configuration Manager 2012 and Windows Intune. More info about WinDays 13 can be founded here www.windays.hr.
Link to both conference can be founded at right side of my blog (under logos).
I’m still working a lot with Windows Intune, so my today post is describing how to add your personal domain to Windows Intune.
First log in to https://account.manage.microsoft.com (portal for adding/manage users and groups)
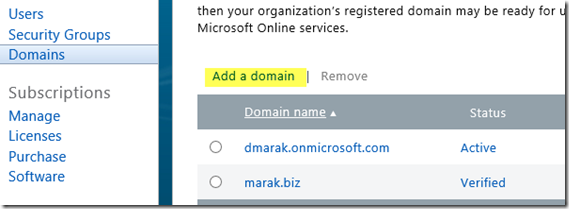
Then go to Domains on your left side and click “Add a domain”.
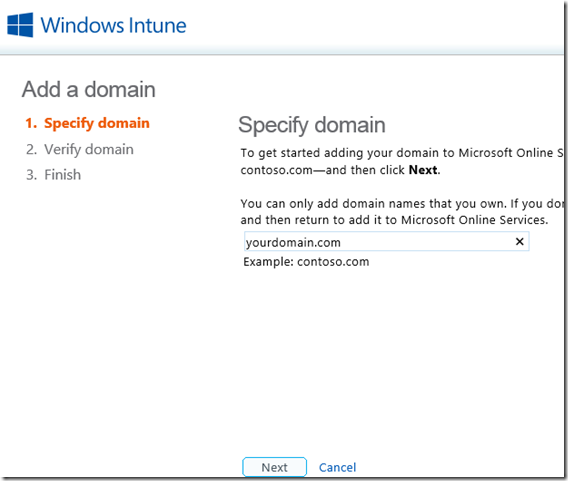
New window will open and in this window you must specify domain you want to add in your Windows Intune subscription
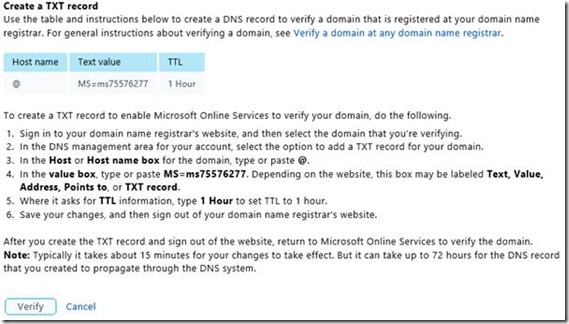
Click “Next”. Now you have to add host record in your DNS server. Host record varies and it is different for every domain and Windows Intune subscription. TTL time must be 1 hour. Here is example.
After you done that. Don’t click “verify”! Wait, about 30 minutes and then click “Verify”. In most cases your domain will be verified and you will have your domain added to Windows Intune (as I have my marak.biz domain). In rare cases you will have to wait up to 72 hours to verify your domain (as you can see in disclaimer).
If you don’t have time to wait. You can click “cancel” you will not lose changes you made. Your domain will be prepared and waiting for verification.
Have nice day


If you are going for best contents like me, just
visit this web site everyday for the reason that it offers
quality contents, thanks
Great article! We are linking to this particularly great
post on our site. Keep up the good writing.
A work mate recommended me to your resource. Thnx for the
details.